
Spring is here finally (tra-la! tra-la!) and it’s time to get back into the yard to repair Winter’s damage and install new antennas. In particular, I want to possibly upgrade the Resonant Loop I am using for 90% of my DX time. In the past, this has generally involved intensive and error-prone hand calculations, and I was looking for a way to automate the process, or at least portions of the process. Thus, I wrote a bit of code to help streamline the design and evaluation, and hopefully help to root out the best solution.
The loops I use are usually square loops built on PVC pipe frames. These loops will almost always have a pair of identical windings separated by a center gap; this gap dramatically reduces the winding parasitic capacitance an helps to extend the tuning range. The code I wrote assumes a center gap of 3″ (which is typical for construction on 3/4″ PVC pipe) and a winding pitch (gap between adjacent turns) of 1/2″, but these values may be easily changed for exploration into other design areas.
One of the more difficult problems is computing the loop inductance as a function of the number of turns and loop side length, so the first part of the code does this for me. The code generates an array of inductance values which represents the computed inductance for a loop with turns counts of 2, 4, 6, 8, 10, and 12 turns, and side lengths of 0.25 – 1.125 meters, and then displays the results graphically. These curves may be of use to anyone who is contemplating building a loop.
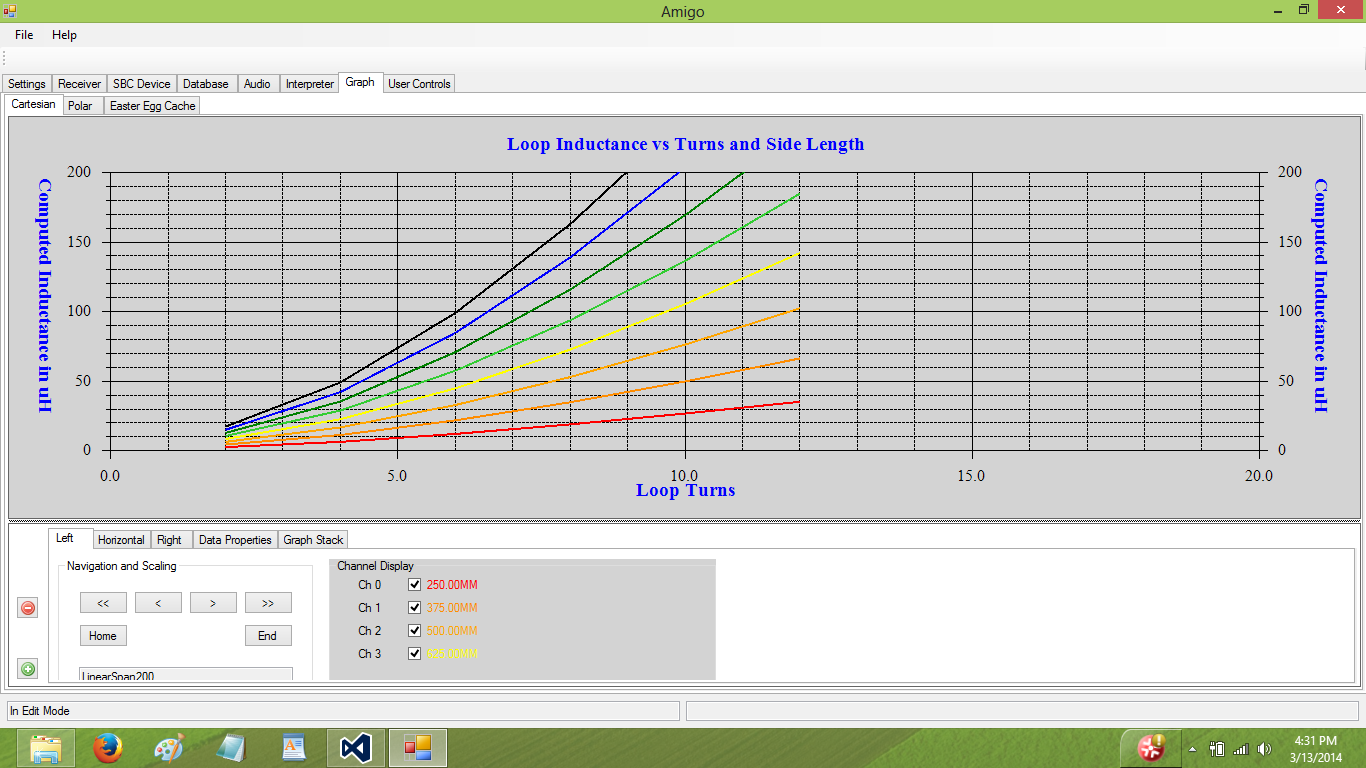
The curve rendered in red represents a side length of 0.25M, and the black curve represents 1.125M. These curves represent the solution array of inductance values. One of these values might be appropriate for my loop design, but which one? To select an appropriate inductance value, the code needs to know about the intended loop tuning range, and also the capacitor used to tune the loop. From that info, it can compute the winding inductance which is required.
If you scan horizontally along any horizontal grid line (along any given value of inductance) you will note that there are several turns-side length value pairs which could generate that inductance. The question becomes: “Which is the best or most appropriate for the design goal?” Which begs the question “What is the design goal?”. Resonant loop design is the art of compromising performance in one area against several other areas. In this code, the design goal is kept simple: from the turns-side length pairs which generate the proper inductance ( +/- 20% ) we are going to select the solution which has the greatest product of turns and loop area; we are selecting for maximum Numerical Aperture.
The code then iterates through the array of inductance values, and determines if a value meets the inductance requirement dictated by our desired tuning range. If it finds a solution, it computes the Numerical Aperture ( number of turns times the side length squared), and tracks the solution which represents the maximum Numerical Aperture. When done, it presents the best solution in a dialog box, or…
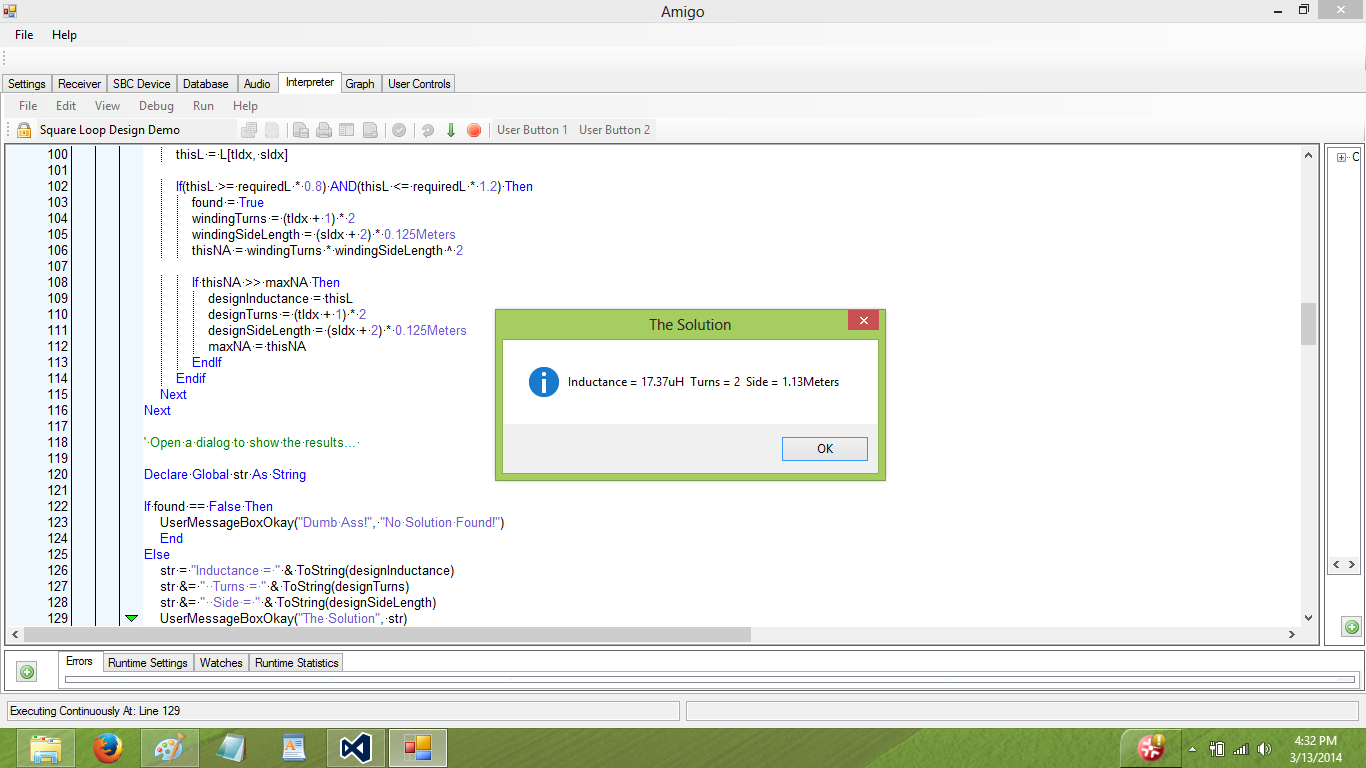
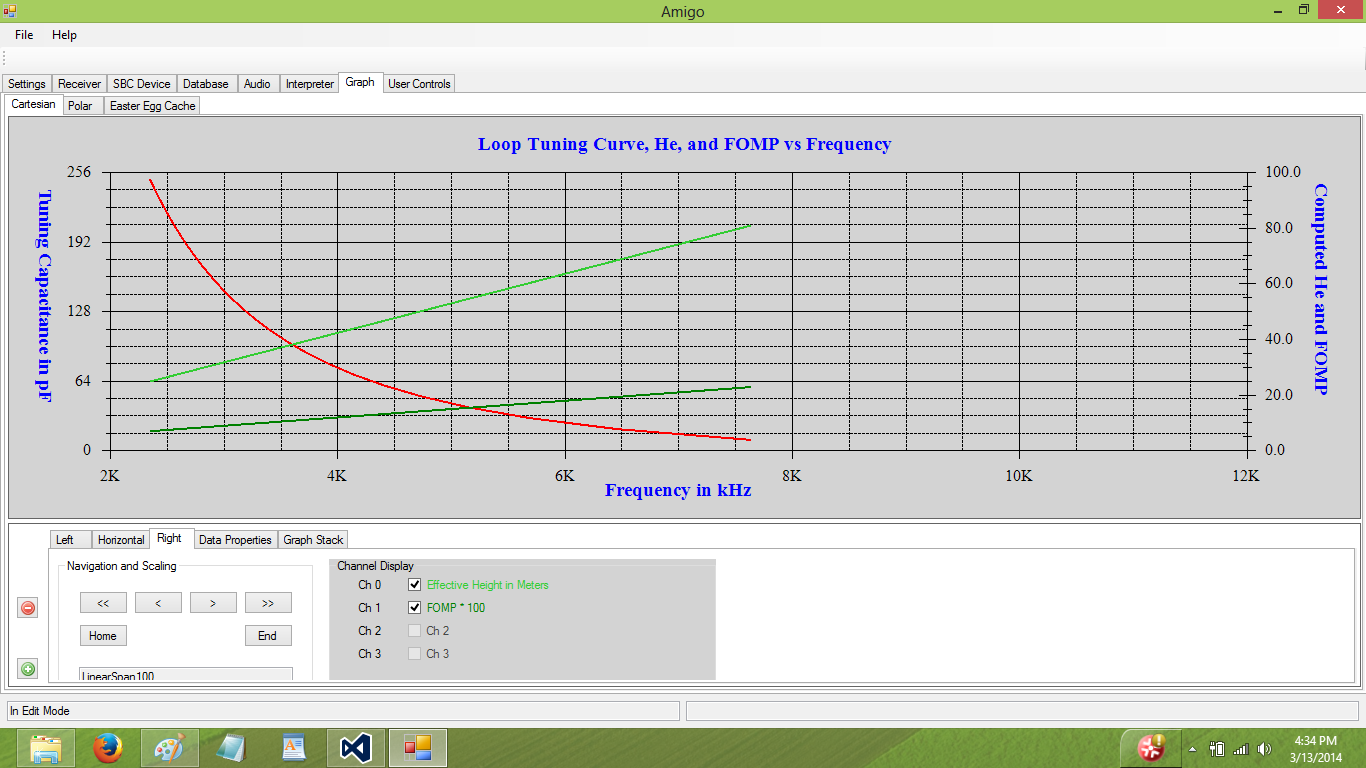
The code is telling me that I should make a loop which has 2 turns, with a side length of 44″, which is a point along the red curve in the graph. This is interesting, since my current loop uses 4 turns with a side length of 20″, which is point along the Ch. 2 curve in the graph. Whatever. Knowing the number of turns and side length, the code finishes off by generating a graph of important loop parameters over the loop tuning range. These are:
– The loop Tuning Curve (capacitance vs. frequency)
– Effective Height He – the length of a vertical wire having the same output as this loop
– Figure of Merit with respect to Pattern (FOMP) – the ability of the loop to generate a pattern null
And that’s about it. If you are interested in the code used to generate these graphs, you can see that here:
https://www.mediafire.com/?uvkbx5l6o6tyc85
This contains greater comment detail than is presented here.